Cleaning Services Dublin | Reliable & Professional Cleaning
Professional Cleaning Services in Dublin | Reliable & Affordable

Need trustworthy cleaning services in Dublin? Our track record speaks for itself. We have completed over 1 million cleans and earned a 4.7/5 star customer satisfaction rating. This makes us one of Ireland’s most trusted cleaning companies. PH Cleaners knows your Dublin property needs more than simple tidying to stay clean, especially in our busy city.
Your needs drive our complete house cleaning services in Dublin. We serve homeowners, tenants, landlords and business owners alike. Our 25 years of experience lets us deliver exceptional cleaning services using cutting-edge equipment and eco-friendly products. Our professional cleaning removes 98% of allergens, dust and pet dander from surfaces. This creates a healthier space for you and your family. We have earned the trust of more than 40,000 Irish customers, and we won’t stop cleaning until you’re completely satisfied.
PH Cleaners offers full-spectrum house cleaning in Dublin
PH Cleaners offers complete house cleaning solutions that reach every corner of your home in Dublin. Our professional teams deliver outstanding results that revolutionise living spaces across the city with deep cleaning services and specialised treatments.
Deep house cleaning for move-ins and regular refreshes
Our certified move-in and move-out cleaning service helps you get your rental deposit back without stress. We use a proven, agency-approved checklist to clean houses and apartments thoroughly. This includes all rooms and appliances. Property owners can benefit too – a professionally cleaned property shows potential buyers they won’t need much redecorating. This helps you get the maximum asking price. Your home’s security matters to us. Our team goes through strict training and background checks before they start working.
Oven and bathroom sanitisation services
Our bathroom cleaning experts remove up to 99.99% of harmful bacteria and viruses through detailed sanitization. The process starts with a complete inspection. We then clean tiles, grout, toilet, sink, shower, bathtub, mirrors, and floors with specialised products. Stubborn problems like limescale, mildew, and soap scum get extra attention. The oven cleaning team uses dip tank methods to remove tough stains and burns safely. Your family’s health is our priority, so we use non-toxic, eco-friendly cleaning products during sanitization.
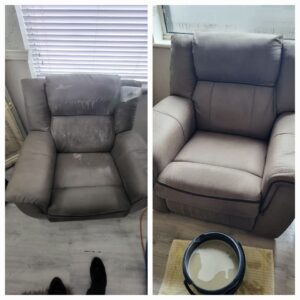
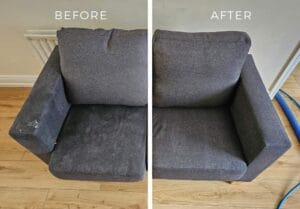
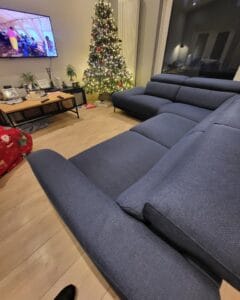
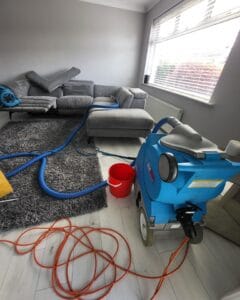
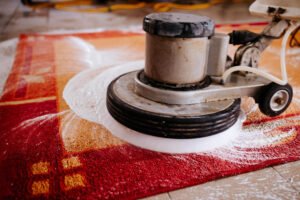
Carpet, rug, and upholstery steam cleaning
Our hot carbonating extraction cleaning reaches deep into carpet fibres. This removes 98% of common household allergens and 89% of airborne bacteria with added sanitizer. Regular steam cleaning uses too much water. Our method uses 80% less water, which means carpets dry in 1-2 hours instead of days. The upholstery cleaning service makes furniture look better and last longer. It also removes dust mites, mould, and pet dander that cause allergies.
Tile and grout deep cleaning for kitchens and bathrooms
Dirt and grime stick easily to porous grout, tile, and stone. These surfaces can become perfect spots for bacteria to grow. We use specialised cleaning solutions and powerful suction equipment to remove dirt and bring back original colours. After cleaning and sanitising with hospital-grade products, we apply a strong sealant that protects against stains and damage. Getting your tiles professionally cleaned every 12-18 months will keep them shining and reduce your cleaning work significantly.
PH Cleaners tackles outdoor and structural cleaning needs
PH Cleaners stands out in detailed outdoor maintenance and restores Dublin properties’ exteriors to pristine condition. We use advanced equipment and eco-friendly solutions that handle the toughest outdoor cleaning tasks.
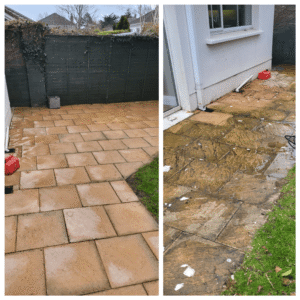
Power washing for driveways, patios, and decks
Our detailed pressure washing service removes all stains and impurities from outdoor surfaces. The powerful equipment tackles stubborn build-up but remains gentle enough to protect the material underneath from damage. We clean tarmac and concrete driveways, patios, decking, and cobbleblock surfaces. Our techniques get rid of unsightly algae, slime, moss, oil stains, and built-up grime. This service restores your outdoor spaces and helps them last longer.
Window cleaning for residential and commercial properties
Our window cleaning experts deliver crystal-clear results for Dublin’s homes and businesses. The team uses state-of-the-art equipment to reach even hard-to-access areas. Business owners can choose daily, weekly, or monthly cleaning schedules to keep their properties looking professional. Homeowners benefit from our subscription service with 6 or 12-weekly cleaning rotations. This ensures spotless windows without the hassle of regular bookings.
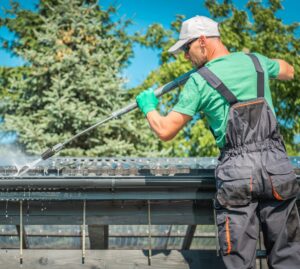
Roof moss removal and gutter clearing
We use specialist softwash roof cleaning technology that removes moss safely without damaging your roof tiles. The gentle BioWash™ process works great on tile, slate, concrete, metal and aluminium roofs. After cleaning, we apply an anti-fungal treatment that kills micro roots and lichen. A waterproof fungicidal coating protects your roof afterward. Our gutter clearing service prevents water damage by removing leaves, debris, and blockages that could cause overflow and structural problems.
Exterior wall and fence cleaning
Our wall and fence cleaning services make your property look new by removing years of dirt, algae, and weathering. The team combines soft washing, power washing, and biocide treatments based on surface type and contamination level. These methods improve your home’s appearance and protect surfaces from wear, which helps them last longer.
PH Cleaners ensures safety, eco-friendliness, and reliability
PH Cleaners has a steadfast dedication to safety, sustainability, and customer satisfaction. Dublin cleaning services must focus on both results and responsibility because more people worry about chemical exposure in their homes.
Use of biodegradable and family-safe products
Safety takes priority in all our cleaning projects. Our eco-friendly cleaning products come from plant-based, biodegradable ingredients that clean well without risking anyone’s health. These powerful non-toxic solutions keep your family away from harsh chemicals and your surfaces spotless. These products work great for families with young children, pets, or allergy sufferers since they don’t have harsh toxins or irritants that might cause asthma, rashes, or headaches. Your environment stays free from harmful residues even during deep cleaning.
Fully insured and background-checked staff
You need peace of mind when cleaning professionals enter your home. The core team has full insurance with liability coverage up to €5 million. You’ll be completely covered if anything unexpected happens. On top of that, we run thorough background checks on every team member through our strict recruitment process. Each cleaner learns professional cleaning techniques and safety protocols through extensive training before they step into any client’s property. Only trustworthy, skilled professionals represent PH Cleaners in Dublin homes and businesses thanks to this careful screening.
Flexible scheduling and free rescheduling
Dublin life moves fast, so we built our booking system around what works for you. Our cleaning teams work seven days a week, including holidays, to fit even the busiest schedules. We can get keys from neighbours or estate agents to clean while you’re away if you can’t be there during your appointment. Plans change sometimes, and we know that – that’s why we let you reschedule for free with enough notice.
Transparent pricing with no hidden fees
Trust comes from honesty, so we keep our pricing structure clear and simple. We don’t have hidden charges or binding contracts like many other cleaning services. You can pick services that match your budget without surprise costs through our fair pricing model. Our eco-friendly cleaning formulas are concentrated and last longer than regular products, which gives you better value over time.
How PH Cleaners delivers a seamless cleaning experience
The path to a spotless space starts before any cleaning begins at PH Cleaners. Our four-step process will give a careful service from the original contact through to completion. This shows our dedication to excellence in house cleaning Dublin.
First meeting and customised quote
Your unique requirements are the foundations of our service. Our team sets up a detailed consultation where you can tell us about specific cleaning needs, how often you want the service, and any concerns you might have. This assessment helps us really understand your space. We look at factors like layout, how often the space is used, and surface materials. You’ll then get a personalised quote that matches your cleaning requests. We don’t believe in one-size-fits-all solutions. Our customised plans recognise that each space—from cosy studios to large estates—has its own cleaning challenges.
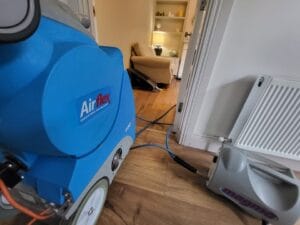
Arrival with all equipment and supplies
Our professional team arrives on time on your scheduled cleaning day. They come fully equipped with all cleaning supplies and equipment. This readiness means work starts right away. The specialists bring professional-grade tools that are right for different surfaces and cleaning challenges. You won’t need to provide any cleaning products or equipment—we take care of everything.
Detailed cleaning checklist made just for you
The professional team works step by step through a detailed checklist created for your property. This organised approach means we clean every area, whatever hidden spots we find. The cleaning covers everything from simple dusting and hoovering to deep bathroom and kitchen sanitization. The team pays extra attention to specific areas or tasks you mentioned in our first meeting. This means your particular concerns get the focus they need.
Final inspection and customer feedback
Quality assurance is central to our service. We finish each clean with a thorough check to make sure all tasks meet our high standards. Our quality checks include detailed inspections, photos, and client sign-offs. This gives you complete satisfaction with the finished work. We fix any areas that need more attention before we call the job complete. Your feedback helps us make our house cleaning Dublin services even better.
To get exceptional cleaning services Dublin, contact PH Cleaners today on 089 610 3281.
Conclusion
Dublin’s unique challenges make professional expertise essential for keeping living and working spaces spotless. PH Cleaners has become Dublin’s top cleaning solution, and our services go way beyond simple tidying. Our 25 years in the business have taught us that true cleanliness needs complete care – from carpets and upholstery to outdoor spaces and structural elements.
Our steadfast dedication to customer satisfaction makes us different. We’ve developed a detailed four-step process that ensures excellent results every time. We also use eco-friendly, family-safe products that show our commitment to your wellbeing and environmental responsibility.
Your peace of mind matters to us. That’s why our staff is fully insured and background-checked, ready to help with one-time deep cleans or regular maintenance. Our specialists bring professional-grade equipment designed for each specific cleaning challenge, which means you don’t have to worry about a thing.
You might need carpet steam cleaning that removes 98% of common allergens, powerful outdoor washing for driveways and patios, or a complete move-in cleaning service. Whatever the task, PH Cleaners delivers exceptional results. More than 40,000 Irish customers have experienced the difference our professional approach makes.
PH Cleaners is your go-to choice for reliable, affordable cleaning services in Dublin. We’ll transform your space with transparent pricing, flexible scheduling, and careful attention to detail. Call us today at 089 610 3281 and find out why thousands of Dublin residents trust us with their homes and businesses.
Facebook